Quickmail
The Quickmail block is a great way to contact your students. It uses the same list of students you see under the Participants list and keeps a record of each message you send, as well as to whom you send it. Except in rare instances, the students' Acadia email addresses will be used, so it is good to remind them of their responsibility for checking their email. The Service Desk can help them with any questions they have. There are also some options that may or may not be of use to you:
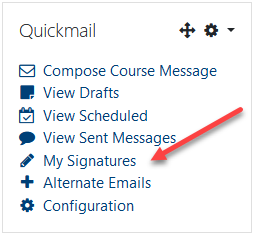
- Signatures - you can add any number of Signatures to be attached to your messages (view image).
- Alternate Emails - this option allows you to set up alternate reply-to addresses (view image). When you send an email message using an alternate email address, the message will show as coming from you, but replies will go to the alternate address you selected from your list. When you set up an alternate address, a confirmation email will be sent to that address with a link you will need to follow to authenticate it.
Composing a New Email Message
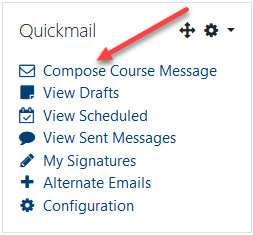
- From the appropriate course, click on the Compose Course Message link in the Quickmail block, usually near the top right of the main course page (view image).
- If you have set up and wish to use an Alternate Email, select it from the From drop-down list (view image). This address is where replies will go.
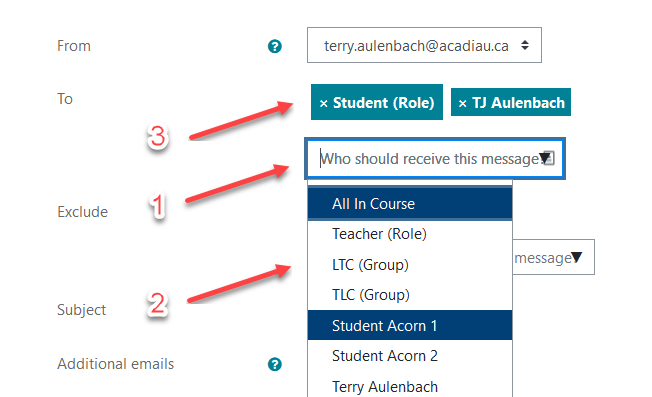
- Click on the Who should see this message dropdown list (1) to select your recipients (2). You can select by role (e.g. students), by group, or individually. As you click on each selection, it will show up in the To field (3) (view image).
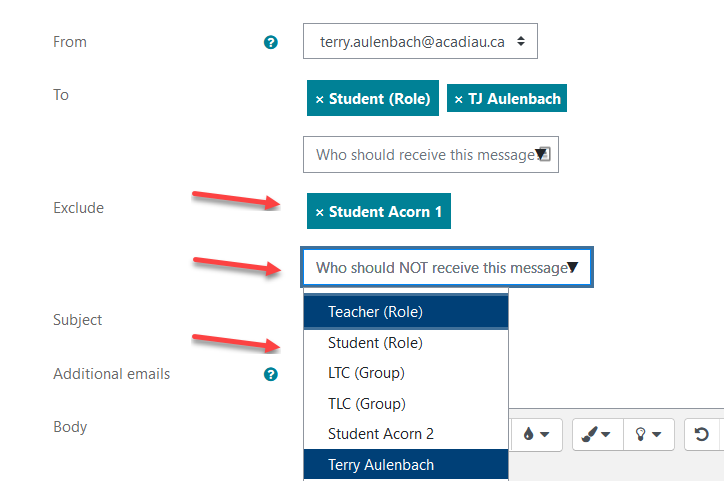
- If you want to exclude one or more people from the list of recipients (maybe you are planning a surprise party for your TA), click on the Who should NOT receive this message dropdown list and follow the same procedure as above. Those you select will show up in the Exclude field (view image).
- If you need to copy the message to someone not listed (e.g. Admin Assistant, Dean), enter as many as you like, separated by commas.
- Anything you add to the Attachment(s) box will be uploaded to your course and a link sent to the students in the email.
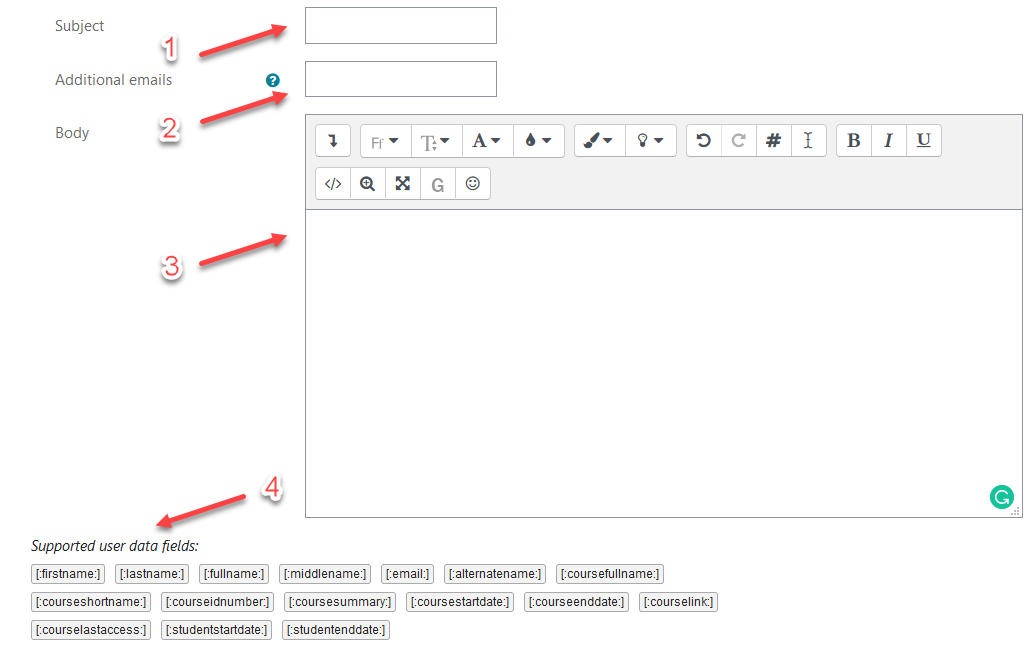
- Subject (1) - I'm sure you all know what to do here. The Additional emails box (2) allows you to add multiple addresses external to your course, separate by a comma. Body (3) - the usual. However ... there are now Supported user data fields: (4) that you can use to create individualised messages (view image). For example, you can type "Dear [:firstname:]" in your message to address people personally. Or you could remind everyone how recently they've accessed the course using the [:courselastaccess:] data field. And don't forget that you can access all the toolbars and buttons in the editor by clicking on the
 button.
 - Attached files are actually uploaded to the course, with a link being sent out to recipients (view image). For more information on uploading files, please review this page.
- The Signature dropdown list allows you to select a Signature you have already set up (view image).
- You can now schedule a date and time for a message to be automagically sent. First, check the Enable box (1), then set your date and time (2). The Receive a send report option (3), when checked, will send you a report on the details of your email after it was successfully sent.
- When you are ready to send the message hit the good ol' Send Email button. If you feel you may need to cool down and drink a coffee before you rewrite your email in a way that will not involve a visit to your department head's office, or if you just don't have time to finish it now, just click on the Save Draft button instead (view image).
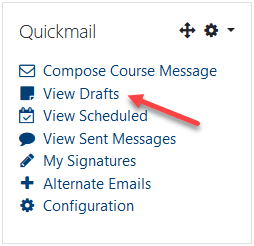
- You can access your draft(s) by clicking on the View Drafts link in the Quickmail block in your course (view image).